a stuffed animal of your choice - something longer than tall would probably be best
painter's tarp - a lot of it - wider the better - not the thin stuff - we used 4-mil. i think. just make sure it will hold air in. some thin kinds will not.
packaging tape - a lot of it - we kept having to buy more and more tape - then we discovered the multi-pack - don't go cheap on this - buy the best quality you can find - 2"scissors
graphing paper
time
a giant room that is it. i think.
Step 1:
This is important. Draw or take a picture of your stuffed animal. You are going to decimate it soon. You need to know how thing went together. You'll get mixed up.
Label each section however you see fit. We went with letters as this picture proves.*
*this picture i mention seems to be missing. maybe i'll add it later. it's somewhere
Step 2:
Decimate it. Actually, just tear it apart at the seams keeping the sections intact. Write on the back of each piece the letter (or number) you label it in the corresponding drawing (or photo)
 3:
3:Trace the outline of each section on to the graph paper. You might need to tape together a couple pieces of the paper. Just make sure the squares line up when you do. Again, label each piece appropriately. This is the end of labeling.

At this point you have to figure out how big you want this thing to be. I think ours was about 13 ft tall. Plenty large enough. I don't have the slightest idea how much tape and tarp we went through except to say it was a lot and we had to revisit the hardware store a number of times. If I were forced to guess, which I have not been, I would likely say we bought 5 100 ft rolls that were 10 ft wide.
Make it big as you can.
Nevertheless, you have to make a decision here and when you do, figure out a reasonable ratio for how much space each square on the paper will represent. We wanted the walrus to be about 25 feet long. If each square represented 6 sq. inches in the real world, the thing would be 27 ft long. That is what we went with. As you can see, we boxed out the drawings in 3 x 3 so each square on paper represented 1.5 square feet. You can now figure out how big your pieces of tarp have to be for each section.
I hope that makes sense.
 4:
4:
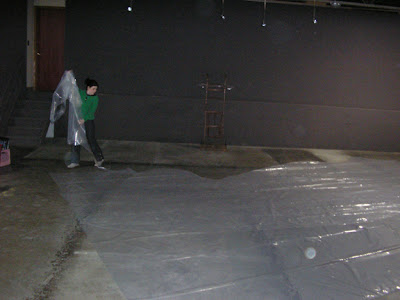
Now that you know how big each section is going to be, lay out some tarp. Clean the floor first.
Cut the tarp down to size keeping the rectangular shape. Find a crayon that draws on the tarp. (That is another thing you'll need.
Crayon.) With the help of your graph paper drawing, redraw the section on the tarp. We did a lot of measuring and marking of where each curve took place to help guide us along. (As in, "The curve of the nose begins four feet down from this corner and two feet over from there. Let's make a mark there.") This helped quite a bit.
Or you can just recreate the whole grid if you want. That is a little ridiculous, though. Now that I think about it, we did mark each 1.5 ft along the sides. This also helped quite a bit.
If your genes provide you with enough talent, you'll have a giant precise version of the drawing. Cut the thing up. Roll it up. Store safely. Repeat with each section.
And label each section.
 5:
5:
Taping. This is the part where you'll begin to dislike the person who is doing this with you.
Don't worry. When it works you'll be friends again.
The book recommends one person cutting tape and handing it to the other to apply it. This seemed sensible.
Using your drawing (or photo) of the animal, figure out which sections go together. Do the parts (arm, head, tusk, fin, neck, tail, etc) separately. Hope for the best.
Join the two pieces flat together. Put half the tape on one side and then fold the tape onto the other. Seal it good. We did a fair amount of doubling up on tape. Watch it though and your tape expenses can add up.
You would like to think everything lines up perfectly. Well, the world is cruel and it doesn't. It's better you go in knowing that. We ended up doing a lot of patching, so keep some spare tarp around. In the end though, there seems to be a fair amount of leeway in how far you can be off. You can always go back and patch parts that are too tight if you need to.
When you are half done taping it up, it will seem ridiculous trying to get the second half done as all you have is a giant mesh of plastic laying over itself. You will question whether or not this is all some cruel joke. You will blame whoever convinced you this was a good idea.
We just shoved a couple ladders in the thing to prop it up, so we could tape a little easier. Just do what you have to.
6:
I've done a great job of not mentioning exactly how this thing is supposed to work. Well you need a
fan. A
box fan. Just one. You'll be amazed at what one box fan can blow up.
Cut a hole somewhere in the thing the size of the fan.
As you'll see below, we created a little tarp tunnel to tape to it. (alliteration) Tape it well.
Turn it on. Watch it take shape. Make sure nothing will puncture it.
You'll note some seams burst. This is fine and expected to an extent. The air needs to go somewhere. Reinforce the area around these new holes with more tape so it doesn't get worse.
If some tears are too big, patch them up. Do not try to tape them back together.
We cut a little hole in back so we could enter it. Keep it small as possible.
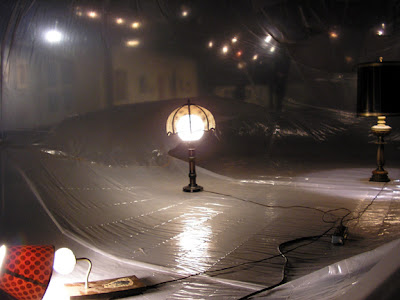
Here are some other pics of it finished and out of focus. Focus is overrated.
Earlier I said I didn't find anyone who had done this before. Then I looked.
Here are
some people who do. Apparently for a living. Must be nice.
They use an iron and other stuff. Who knows.
Questions anyone?


